
How to Make Family Portraits: Capture Perfect Moments
Key Takeaways
- Plan the story, location, timing, and coordinated outfits so your family looks cohesive and relaxed;
- Prioritize light and composition: shoot at golden hour or near a bright window, stagger heads, and keep eyes lit;
- Use stability and control: tripod or steady support, timer or remote, Manual or locked exposure, and burst for sharp, eyes-open shots;
- Finish strong: choose the best photo and print it effortlessly with Mixtiles’ adhesive, repositionable frames, no nails, no damage.
If you are wondering how to make a family portrait that looks professional at home, you are in the right place. With a little planning, great light, and simple posing, you can capture family photos that feel natural and look polished, even with a phone. In this step by step guide, you will learn what to wear, when to shoot, how to pose, and the easy way to get your pictures on the wall with Mixtiles.
Turn today’s favorite family photo into beautiful photo tiles. Download the Mixtiles app, pick a frame style, and get adhesive, repositionable wall arts delivered, no nails needed.
What story do you want your family portrait to tell?
Start with a simple idea that fits your people. Then match the location, time, and outfits so everything looks like it belongs together.
How do you pick a theme, location, and time?
Begin with a quick plan so your portrait session flows smoothly and everyone knows what to expect:
- Choose a vibe, for example playful in the park, cozy at home, or classic on a neutral background;
- Shoot during golden hour outside, or near a bright window for soft, natural light inside;
- Keep sessions to 30 to 60 minutes so kids, and adults, stay fresh and happy.
How should you coordinate outfits (without being too matchy)?
Pick two or three complementary colors, skip loud logos, and dress for the location. Mix textures and layers so every person looks like themselves. Comfort comes first because confidence looks great in pictures. If extended family is joining, share a quick clothing palette so the whole group feels cohesive.
What gear and settings work best (even with a phone)?
You do not need pro equipment. A steady camera, consistent exposure, and simple controls will help you make sharp, flattering images.
Should you use a tripod or support?
Yes. A tripod or a stable surface reduces blur and frees you to interact. Set the lens at eye or chest height for a natural perspective. Use a remote, watch, or 3 to 10 second timer so you can step into the frame and still click at the right moment.
Which settings keep everyone sharp?
Lock things down to get reliable results, even when photographing families with many moving parts:
- Phone: Tap and hold to lock focus and exposure, slightly lower brightness to protect highlights, and use burst mode for multiple looks;
- Camera: Use Manual for consistent exposures, set shutter speed at least equal to focal length, and choose f/4 to f/8 for groups so every face stays in focus;
- Use focus lock or back button focus so focus does not jump between frames.
How do you pose and arrange people so everyone looks great?
Keep it simple: bring people close, create gentle diagonals, and encourage natural interaction so the image feels like your family.
How do you arrange heads and bodies?
Stagger heads into soft diagonals, not strict rows. Close small gaps and add light touch points, for example a hand on a shoulder. If it bends, bend it: relaxed elbows, knees, and wrists help everyone look comfortable rather than stiff.
How do you flatter every face and body?
Angle bodies slightly, then ask for a gentle chin forward and down. Seat some people or widen stances to balance different heights. If someone worries about a double chin, raise the camera slightly above eye level and turn them toward the light.
How can you keep kids happy and get real smiles?
Let kids be kids. Short prompts and play will get you the best expressions without stress.
Try a walking prompt, a quick tickle, or a group squish to loosen up the scene. Bubbles or a favorite book can help one person focus. Give clear, short directions, celebrate a good frame, and remind parents to keep eyes on the lens while you get kids’ attention behind the camera.
Love the shots you are getting? Turn your pictures into stunning canvas prints. Order your custom canvas prints in seconds, and they will arrive ready to hang.
How do you master light and avoid harsh shadows?
Use soft, directional light you can see in the eyes. If you can see catchlights, you probably have a good setup.
Where should the light come from?
Outdoors, pick open shade or backlight at golden hour to avoid squints. Indoors, face a bright window and place people at a slight angle to the light. A light wall or simple reflector opposite the window will lift shadows for a balanced portrait.
Quick fixes when the light is not perfect
Step into shade, then turn bodies toward the brightest side. Use a white poster board to bounce light under eyes. Small moves often make a big difference and work well for a fast family portrait session.
How do you compose bigger groups without stress?
Keep everyone on the same plane when possible, and avoid extreme wide angles near the corners.
What focal lengths and arrangements help?
Use mid-range focal lengths so faces look natural. Seat a few people, stand a few, and build gentle layers. Ask the group to come close so you do not see distracting gaps.
How do you get eyes open and frames crisp?
Count down, click a short burst, and repeat the pose once. You will get at least one frame where everyone looks toward the lens with eyes open.
Can you make a family portrait when you are not all together?
Yes. Create a simple composite by keeping clothing, light direction, and camera height consistent across shoots.
How do you plan a seamless composite?
Choose a neutral backdrop and share an exact clothing palette before shooting. Capture all parts within 48 hours to match light. Keep poses and spacing similar so edits blend naturally. This is a great way to create a family portrait when someone is away or if schedules will not align. For a more artistic approach, you can also use an AI family portrait generator to combine separate images into a cohesive piece.
What is the easiest way to print and hang your portrait?
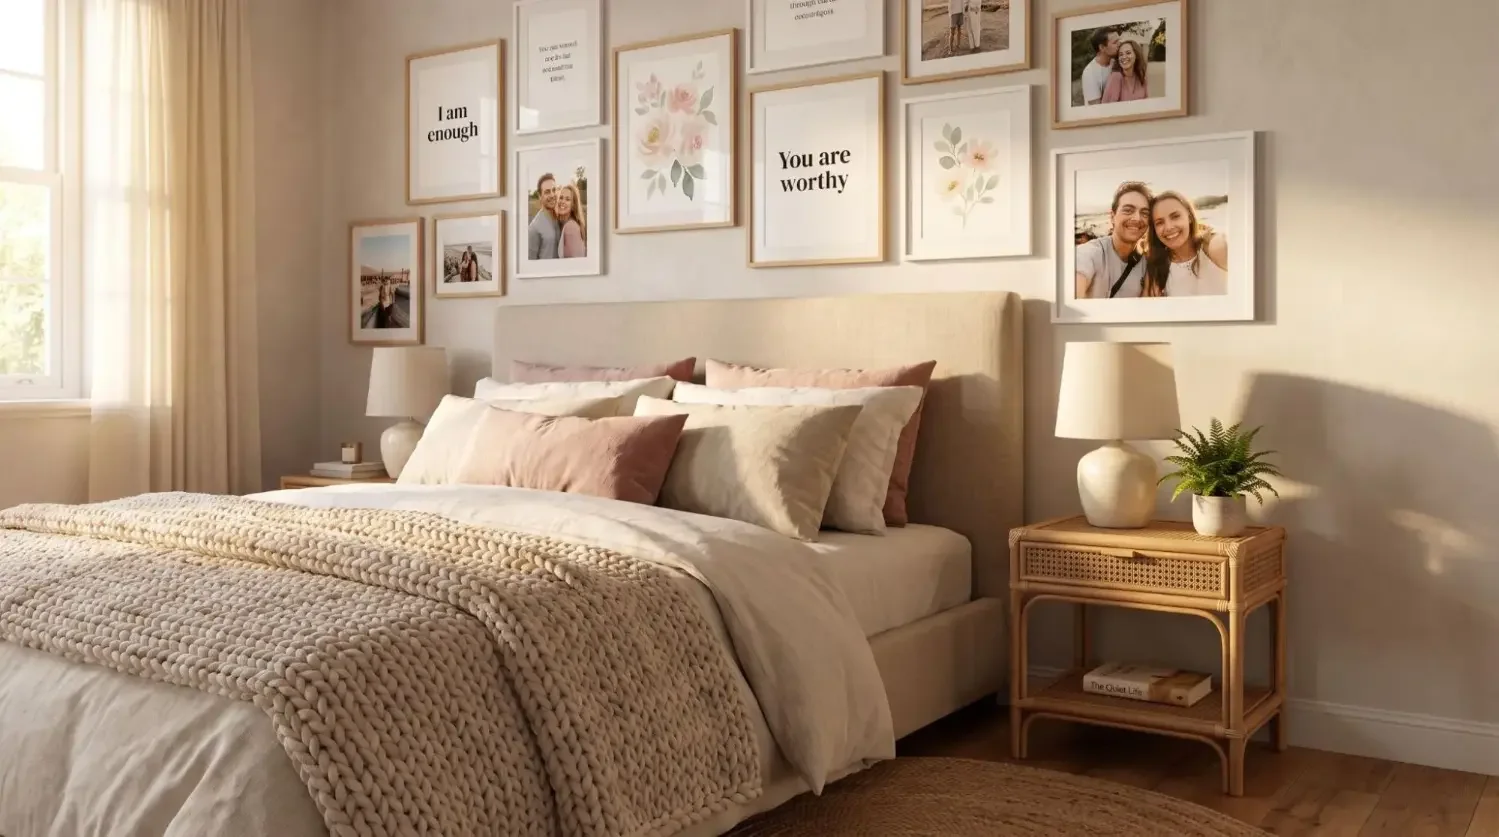
Mixtiles makes printing and hanging easy, affordable, and renter friendly. You can also build gallery wall kits or mix sizes as your family grows. For layout inspiration, explore our family portrait wall ideas for easy, stylish arrangements that fit hallways, stairways, and living rooms.
Why Mixtiles are perfect for family portraits

Tiles are lightweight with adhesive or magnetic mounting that will not damage walls. Frames look clean and modern. You can arrange, re-arrange, and add new family pictures over time without tools. It is an easy way to get great family portraits up where you can see them every day.
Not sure which dimensions will fit your space? Use our family portrait print size guide to choose the right scale for single statement pieces, pairs, and grids.
|
Popular Size |
Best Use Cases |
|---|---|
|
8 × 8 in, 20 × 20 cm |
Symmetrical grids in hallways; kids’ rooms; tight spaces. |
|
12 × 12 in, 30 × 30 cm |
Stairways; mixed family photos and art; flexible gallery walls. |
|
12 × 16 in, 30 × 41 cm |
Hero family photo above a console; pairs and trios. |
|
20 × 27 in, 50 × 69 cm |
Statement portrait over a sofa or bed; extended family group. |

How to order from your phone in 3 simple steps
Ordering takes less time than a portrait session, and it works from your camera roll:
- Upload your favorite images in the Mixtiles app;
- Pick a frame style, border, and quantity that fit your wall and style;
- Check out, then peel and stick when your tiles arrive.
Now you know how to make a family portrait that is well lit, well posed, and full of connection. Plan your story, shoot in flattering light, keep directions simple, and take a short burst to catch the perfect expressions. Then print your best family photo so it does not live only in your camera.
Ready to create a beautiful photo gallery wall? Download the Mixtiles app and turn today’s best shot into a stunning picture wall in minutes, no nails required.
Frequently Asked Questions
How can I make a family portrait at home without a photographer?
Plan a simple theme and coordinated outfits. Use soft window light or golden hour. Set your phone on a tripod, lock focus and exposure, use a 3 to 10 second timer, and shoot short bursts. Stagger heads, get close, then print with Mixtiles.
What is the rule of thirds in portraits, and how do I apply it to families?
Imagine a 3 by 3 grid over your frame. Place eyes on the top third line, give a little space in the direction people face, and anchor key faces near intersections. Centering can work too, so use the grid as a guide, not a law.
What makes a great family portrait?
Connection, light, and composition. Bring people close, create gentle diagonals, and keep eyes lit with a window or open shade. Offer short prompts for natural smiles. Coordinate colors, skip loud logos, and keep the session short so energy and expressions stay fresh.
What is the 20-60-20 rule in photography, and does it help with family portraits?
Some photographers use it as a time guide. Spend about 20 percent planning outfits, location, and light, 60 percent shooting with simple prompts, and 20 percent selecting and printing. The split keeps sessions efficient and ensures you finish with a polished print for your wall.
Be the first to know — deals, news & decor ideas.
By clicking you agree to the Terms of Use & Privacy Policy