
Multi Panel Wall Art: Transform Your Space Effortlessly
Key Takeaways
- Multi panel wall art uses multiple frames to form one stunning image or a cohesive gallery, with formats like diptychs, triptychs, grids, and panoramic splits;
- Planning is simple: choose the right photos, measure your wall, pick a layout, then keep consistent spacing and eye-level height for a modern, balanced result;
- Mixtiles makes it renter friendly: lightweight, adhesive, and repositionable frames that stick and restick, so no nails, tools, or wall damage;
- Use the Mixtiles app or website to preview layouts, align spacing, and order in minutes, then install perfectly straight in under 10 minutes.
Multi panel wall art turns ordinary walls into bold focal points by arranging multiple frames to tell one seamless story. Whether you split a single landscape into a triptych or curate a 3x3 gallery, the look is modern, clean, and high impact. With Mixtiles, you get that designer-level result without nails or tools. Our adhesive, repositionable frames let you stick, restick, and refresh your layout anytime. It is perfect for renters, busy homes, and anyone who loves to switch up their style.
Ready to create your showstopping wall? Start designing your perfect photo gallery wall on our website or in the Mixtiles app.
What is multi panel wall art, and why is everyone talking about it?
Multi panel wall art is a fresh way to display a single photo or a series of images across multiple frames, creating depth and a gallery feel at home. It is popular because it scales beautifully for large wall decor, looks clean and modern, and makes it easy to create a personalized statement in any room.
The core idea in a glance
At its simplest, you are using more than one frame to create one larger composition. That could mean splitting a wide beach panorama into three panels, or arranging a coordinated set of art prints in a tidy grid. The result is a multi panel wall that feels polished, spacious, and intentional.
The most popular formats
Here are the classic layouts people love to create with Mixtiles. Each one adapts easily to your space and style.
- Diptych, two-piece: Minimal and refined, great for narrow walls or hallways;
- Triptych, three-piece: A timeless favorite above a sofa or bed, perfect for panoramic split canvas looks;
- Grids, 2x2, 2x3, 3x3: Clean, modular, and scalable for any wall size or room;
- Panoramic splits, wide horizontals: A dramatic choice for living rooms and large wall spaces.
Which photos work best for multi panel wall art?
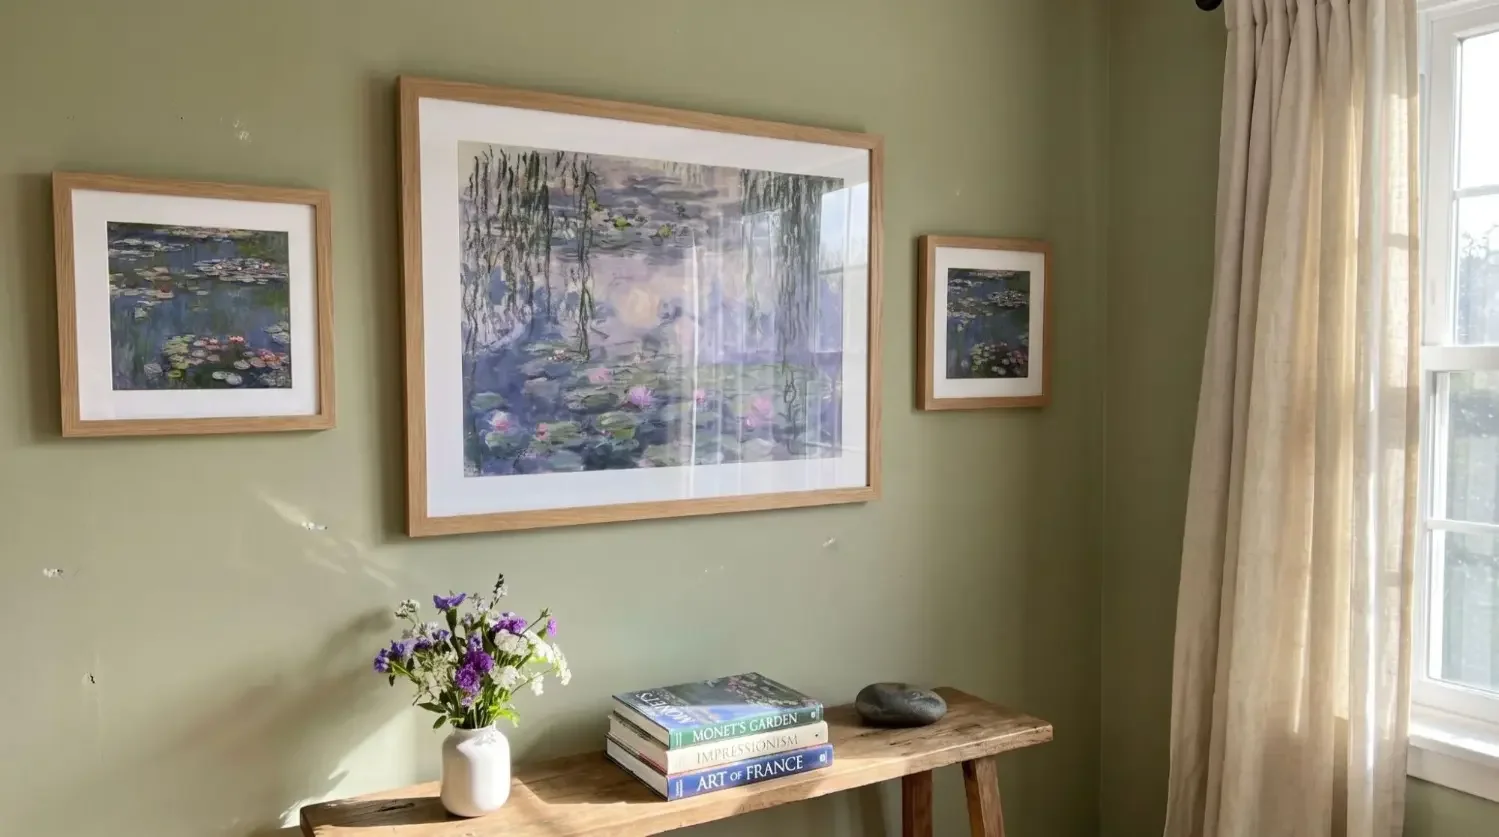
Choosing the right imagery is key. Wide scenes, consistent color stories, and crisp details tend to create the best multi-panel wall art results. If you love personal photos, you will get a custom piece wall that feels one of a kind. If you prefer artwork, abstract paintings and minimalist prints look stunning when split or arranged in grids.
Split one photo or build a cohesive set?
Splitting one image across panels works beautifully with landscapes, city skylines, beaches, or a large portrait where the subject sits away from the seams. For a coordinated gallery, pick a theme like travel, wedding moments, kids and pets, or black and white architecture. Keep a consistent editing style so the colors feel unified on your walls.
Resolution, cropping, and alignment tips
Start with high-resolution files to ensure sharp canvas prints and photo tiles. Keep faces, text, or key details away from split lines so the panel seams do not interrupt the subject. Check horizon lines and any strong leading lines, then align them across the split so your view reads as one continuous image when you step back.
Smart subject ideas that always shine
Try sweeping beach horizons for a calming living room, close-up botanicals for a soothing bedroom, or turn your favorite pictures into a playful AI family portrait for a kids’ area. Minimal black and white artwork feels modern in a home office or kitchen. Seasonal color stories are an easy way to refresh, so you can swap a tile or two when you want a new look and save time while keeping your overall layout intact.
How do you plan the perfect layout and spacing?
Begin by measuring your wall and the furniture beneath it, then choose a layout that fills the space comfortably. Most rooms look best when the overall arrangement spans about two thirds of the furniture width, with a tidy 1 to 2 inches between panels. Keep the center of your display close to eye level for a polished gallery look.
|
Wall Width |
Metric Width |
Recommended Layout |
Approx Overall Width |
Metric Approx Width |
Typical Spacing |
Metric Spacing |
|---|---|---|---|---|---|---|
|
Under 36 in |
Under 91 cm |
Vertical diptych or 2x2 grid of small tiles |
24 to 30 in |
61 to 76 cm |
1 to 1.5 in |
2.5 to 4 cm |
|
36 to 72 in |
91 to 183 cm |
Triptych or 2x3 grid |
48 to 66 in |
122 to 168 cm |
1 to 2 in |
2.5 to 5 cm |
|
Over 72 in |
Over 183 cm |
Panoramic triptych or 3x3 to 3x4 grid |
70 to 96 in |
178 to 244 cm |
1.5 to 2 in |
4 to 5 cm |
Measure first, design second
Measure total wall width and height, then note furniture dimensions like your sofa, headboard, or console. As a guideline, fill 60 to 75 percent of the width above furniture to keep the display feeling balanced and connected to the piece below. Not sure which size to pick? Use our wall art size guide for easy formulas and visual references.
Height and spacing that look pro
Set your center line around 57 inches from the floor so the main multi panel canvas or tile sits near eye level. If your arrangement hangs above furniture, leave 6 to 8 inches of breathing room. Maintain a consistent 1 to 2 inch gap between each panel wall art piece so the composition feels crisp and intentional. For room specific recommendations, see how high to hang art on a wall.
Go-to layouts by wall size
On small walls, try a two-piece vertical diptych or a compact 2x2 grid. For medium spaces, a classic triptych or a 2x3 rectangle reads clean and modern. On a large wall, panoramic split canvas looks cinematic, while a 3x3 or 3x4 grid creates a striking, symmetrical gallery view in your living room or dining room. Want more layout blueprints and spacing tips? Explore how to arrange art on a wall.
How does Mixtiles make multi panel wall art effortless?
Mixtiles removes the guesswork. Upload your photos, choose frame styles and sizes, preview spacing, and order in minutes. Installation is fast because our tiles are lightweight and adhesive. You can move them as often as you like, so your gallery evolves with your life.
Stick, restick, perfect
Our adhesive backing grips securely and removes cleanly on most flat, painted walls. If you prefer magnets, select compatible Mixtiles styles that use a wall magnet pad. Adjust spacing or alignment with a gentle lift and reset. No nails, tools, or patchwork required. It is safe for apartments, dorms, and offices where wall care matters. If you are avoiding holes entirely, learn how to hang wall art without nails.
Preview layouts before you order
Use the Mixtiles app or website to upload photos, test formats like triptychs and grids, and see each panel’s crop. Mix white, black, or wood-toned frames, choose framed or frameless looks, and try Canvas Tiles for a premium gallery finish. You can also explore our pre-designed gallery walls if you want expertly designed templates with curated items to help you get it right on the first try.
Fast setup, clean finish
Each lightweight tile feels like a framed print, without the heavy glass. That keeps installation quick and stress free. If you need ready-made artwork, shop our Fine Art Prints to find abstract, modern, or nature-inspired pieces that complement your existing home decor and color palette.
Love the triptych look? Turn your favorite photos to canvas. Create stunning custom canvas prints in the Mixtiles app today.
How do you hang multi panel wall art straight in minutes?
Plan your arrangement on the floor first, then translate it to the wall using a center anchor tile, a phone level, and a simple spacer. With Mixtiles, you can lift and restick until every edge is perfect, which helps even first timers achieve a pro-grade finish.
Step-by-step with Mixtiles
Follow these quick steps to install a clean, straight gallery without tools.
- Prep the wall: Wipe the surface with a dry cloth to remove dust;
- Place your anchor piece: Start with the center tile at eye level and press firmly;
- Level it: Use your phone’s level or an in-app guide to ensure a straight baseline;
- Add side tiles: Use a cardboard spacer of about 1 to 2 inches to keep gaps consistent;
- Fine-tune: Gently lift and restick any tile to nudge alignment until it is perfect.
Avoid these common mistakes
Do not overcrowd the display. Leave negative space around your composition so it can breathe visually. Avoid splitting focal points, for example a face or important text, directly on panel seams. Do not skip measuring or mocking up on the floor. A quick layout rehearsal saves time, helps you get consistent gaps, and prevents redo work.
Care and safety notes: Mixtiles hold well on most flat, painted surfaces, and many customers successfully mount on textured walls, brick, and wood paneling. Press firmly for a few seconds to help the adhesive grip, especially on rough surfaces. Clean tiles with a dry, soft cloth. Avoid liquids or sprays so your canvas print or photo tile stays pristine over time.
What multi panel wall art ideas work best in each room?
Think about mood first, then match subjects and colors to the space. Calm landscapes and soft neutrals suit bedrooms. Bold abstracts energize living areas and creative studios. Family-focused galleries shine in hallways and stairwells where you pass by often.
Living room

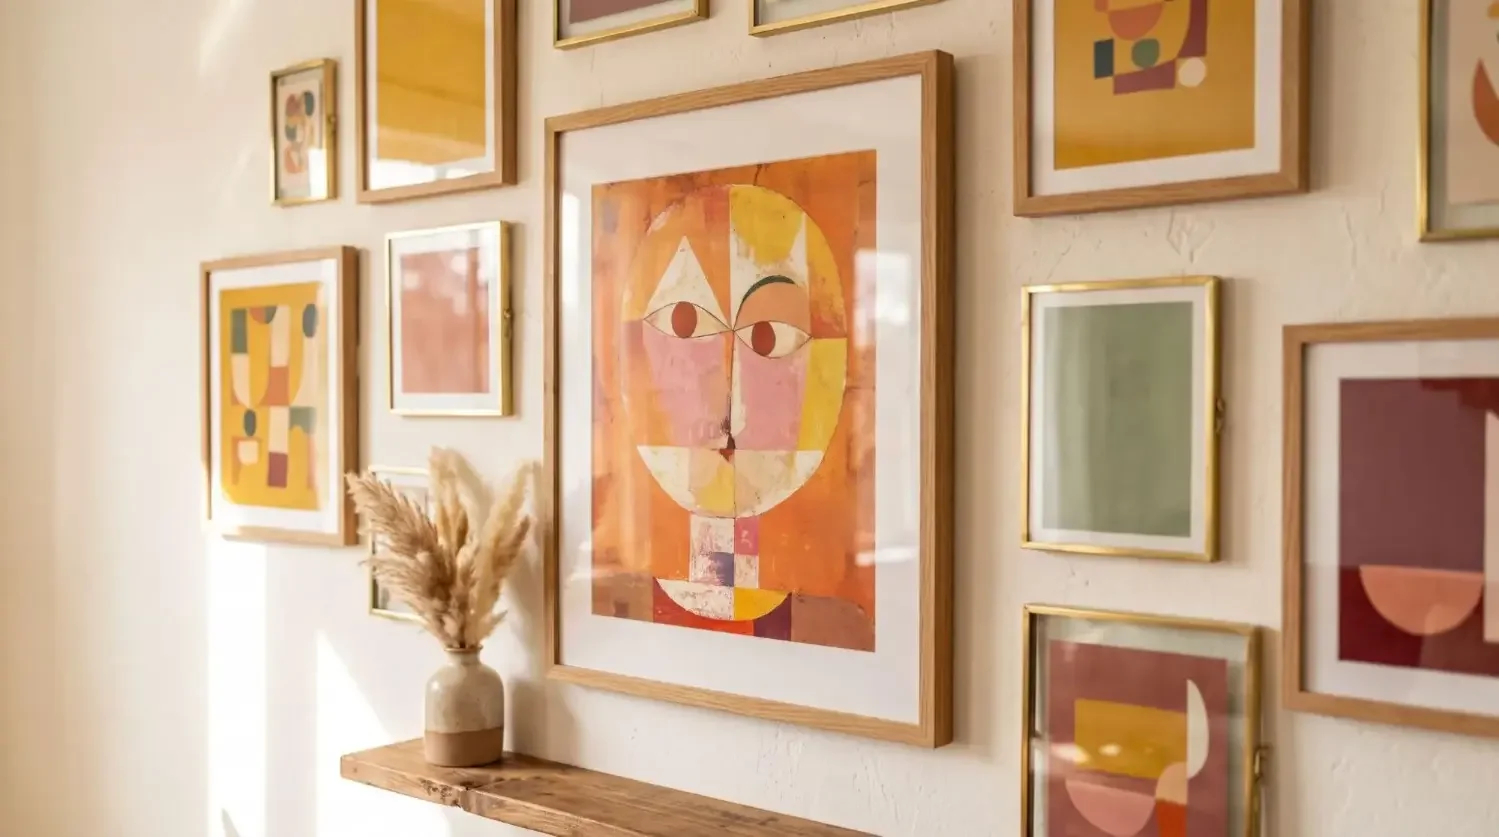
Anchor the sofa with a panoramic triptych or a 3x3 grid to fill a large wall. Coastal horizons, city skylines, or abstract wall artwork create a modern focal point. Black frames feel crisp against white walls, while wood tones warm up neutral decor.
Bedroom

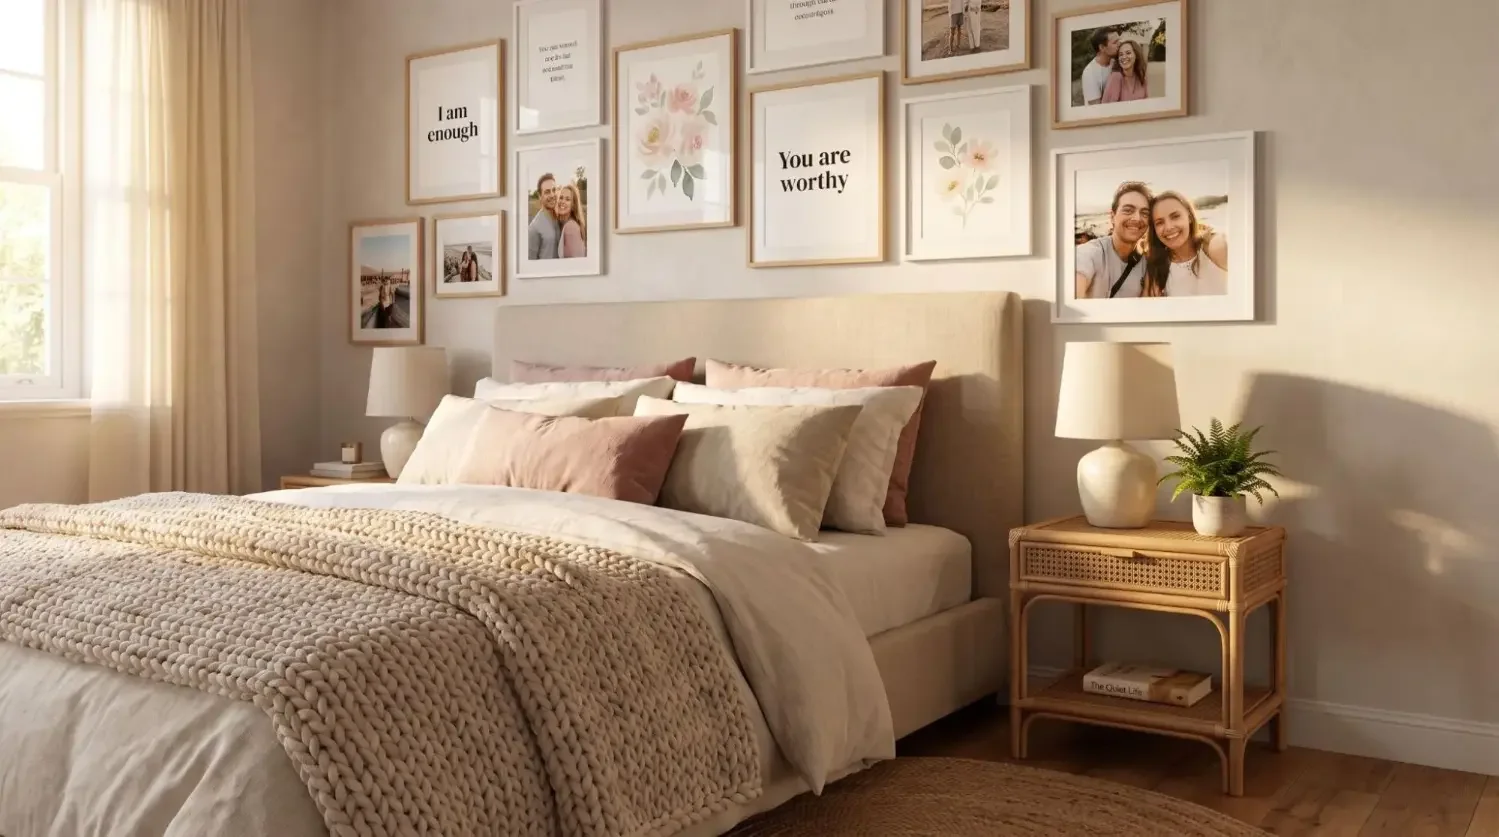
Use a soft-toned three-piece layout above the headboard or a 2x3 set in calming hues. Botanical prints, minimalist paintings, or black and white couples’ portraits create a restful vibe without visual noise.
Hallway and stairs

Choose a vertical diptych for a narrow stretch or stagger tiles that follow the stair rise. A family timeline with kid milestones turns transitional spaces into a personal gallery. Mix square and rectangular tiles for a dynamic panel wall art effect.
Nursery and kids’ rooms

Opt for a playful 2x2 or 2x3 grid. Rotate in new photos as your child grows. Bright colors, favorite animals, and storybook themes keep the room lively. Mixtiles are light and easy to move, a helpful plus when you update the space.
Home office and kitchen

In a home office, try a 3x2 set that blends quotes, brand colors, and travel goals. In the kitchen, compact grids with food photography, farmers market scenes, or cheerful abstracts add personality. These spaces benefit from artwork that sparks creativity and conversation.
Should you choose personal photos or ready-made art?
Both work beautifully. Personal photos add emotion and meaning, while curated artwork can unify colors and textures. Your best choice depends on the story you want to tell and how you use the room.
Why personal photos win at home
Travel memories, family portraits, and candid moments are impossible to replicate with generic prints. They make your home feel like you. Multi panel wall art using your own images becomes a signature piece wall that guests notice and remember.
When to consider artwork
Abstract canvases, minimalist art prints, and nature paintings are great when you want to match existing colors or create a calm base layer. If you upload art, be sure you have the rights to display the image. To browse licensed artwork, shop Mixtiles Fine Art Prints and Canvas Tiles for ready-to-hang products at a friendly price.
Multi panel wall art delivers maximum visual impact with minimal effort, especially when you build it with Mixtiles. From triptychs and grids to panoramic splits, you can design, preview, and order a polished arrangement in minutes, then stick and restick until it is flawless. No nails, no damage, no stress. Choose your photos, pick a layout, and transform your walls into a personalized gallery you will love every day.
Transform your walls with personalized art. Design your custom photo tiles or explore our collection of wall arts to get started.
Frequently Asked Questions
What is multi panel wall art, and why choose it?
Multi panel wall art spreads one image or a coordinated set across several panels, creating a larger composition with depth. Choose it when you want big impact, flexible scaling, and easy updates. It fits wide walls, balances furniture, and lets you swap a single panel later.
How do I size and space a multi panel arrangement?
Measure the wall and nearby furniture. Aim for an arrangement 60 to 75 percent of the furniture width. Keep centers around 57 inches from the floor, leave 6 to 8 inches above furniture. Maintain even gaps of 1 to 2 inches, use consistent panel sizes for balance.
Which photos work best, and what resolution do I need?
Wide landscapes, skylines, minimal abstracts, and cohesive photo sets print well. Keep important details away from seams. For sharp results, supply files that reach 150 to 300 ppi at final size. As a shortcut, a 12 inch panel benefits from 1800 to 3600 pixels on the long edge.
How can I hang multi panel art straight without damaging walls?
Lay out panels on the floor first, then mark a centered baseline on the wall with painter's tape and a phone level. Start from the middle, use a cardboard spacer to keep gaps even, and step back often. Choose removable adhesive strips or rails rated for each panel's weight.
Be the first to know — deals, news & decor ideas.
By clicking you agree to the Terms of Use & Privacy Policy